ConsignO Cloud User Guide
Creating a signature project
Available with: Individual plan Business plan Enterprise plan
Follow the steps below to create a signature project.
From the dashboard, click on New project.

A page will open where you can create a signature project:
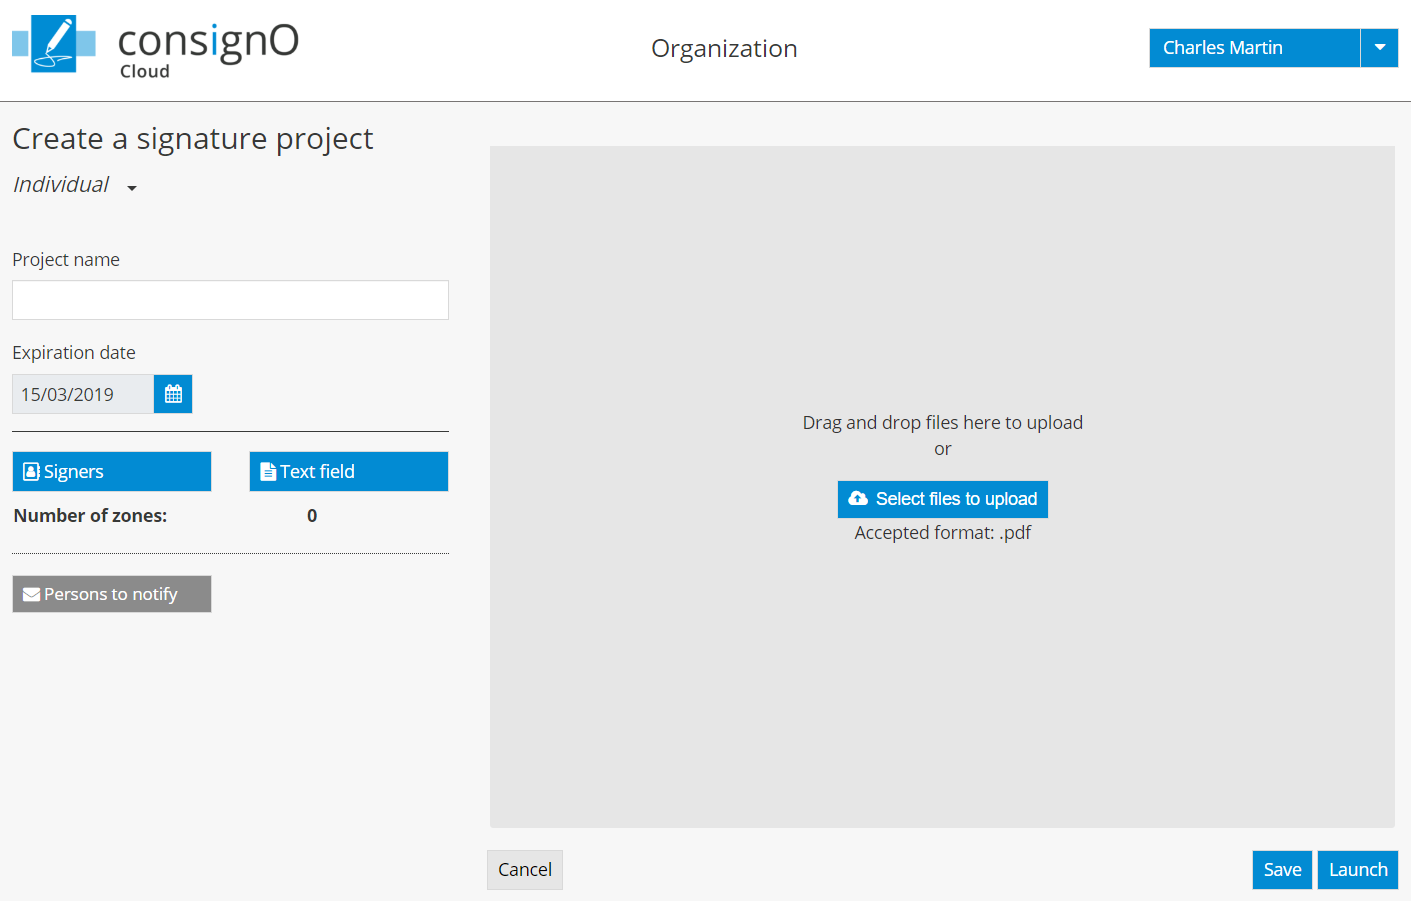
1- Configure the signature project
Give a name to your signature project by completing the field Project name. This is the name that will be sent to your signers and displayed in the dashboard.

![]() The name of the signature project does not have to be unique.
The name of the signature project does not have to be unique.
Assign an expiration date to the signature project.

![]() The expiration date is the deadline that is sent to the signers of the signature project. Once the expiration date has passed, the signature project can no longer be signed. However, the project manager can modify the expiration date of an expired project. Signers who missed their turn to sign will then be re-invited to sign. The default expiration date is set to 30 days following the project creation date.
The expiration date is the deadline that is sent to the signers of the signature project. Once the expiration date has passed, the signature project can no longer be signed. However, the project manager can modify the expiration date of an expired project. Signers who missed their turn to sign will then be re-invited to sign. The default expiration date is set to 30 days following the project creation date.
2- Upload the document to be signed
Upload the document to be signed by clicking on Select files to upload or by dragging and dropping the files in the grey zone.
Note: The platform only accepts PDF files.
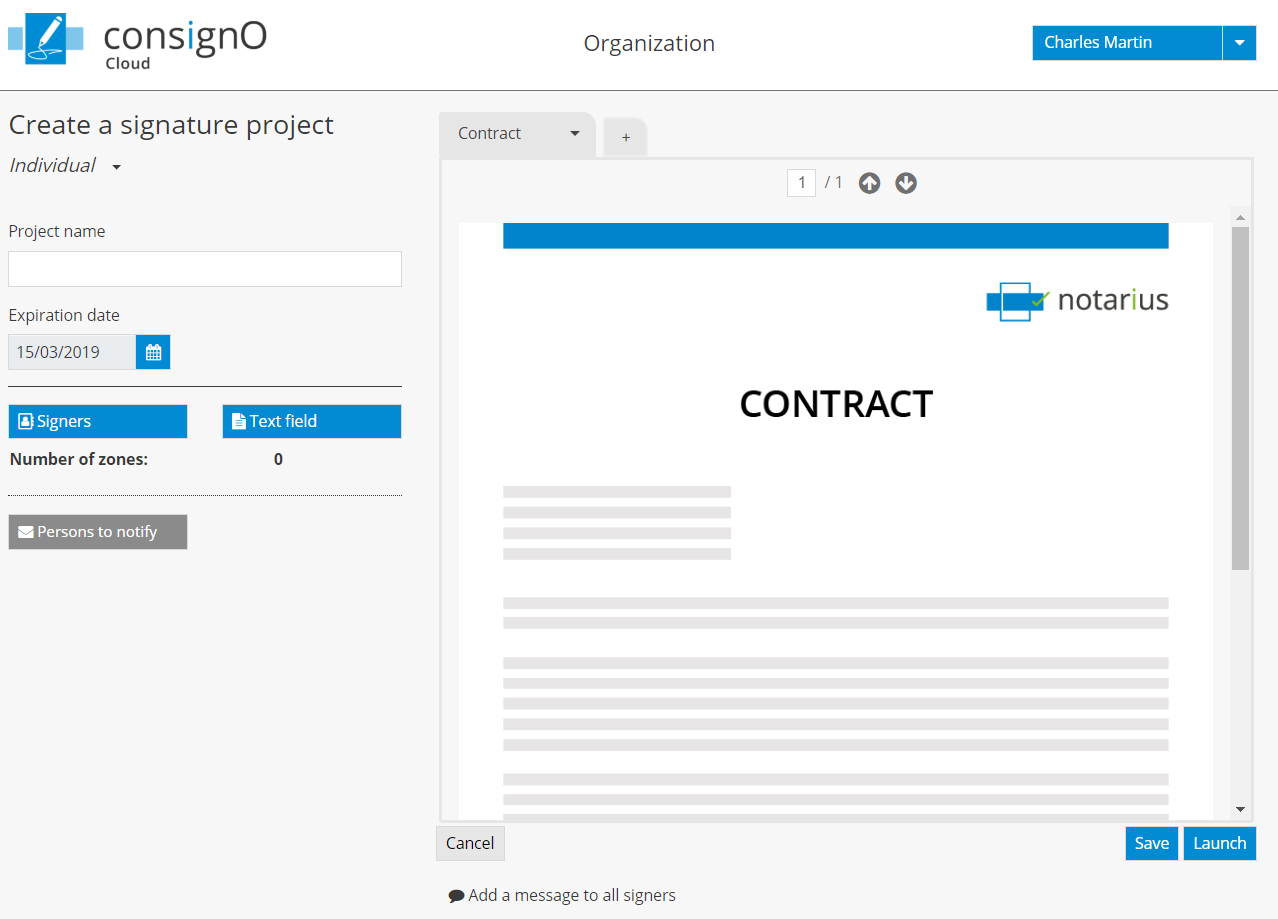
![]() You can delete documents by clicking on the trashcan icon located in the document tab. However, files cannot be deleted or replaced once the signature project has been launched.
You can delete documents by clicking on the trashcan icon located in the document tab. However, files cannot be deleted or replaced once the signature project has been launched.
3- Add signers to the signature project
Click on Signatories to define a new signer or to select it from your ConsignO Cloud address book.
To define a new signer and choose the type of signature required, click on New signer (see how to add a new signer to your address book)
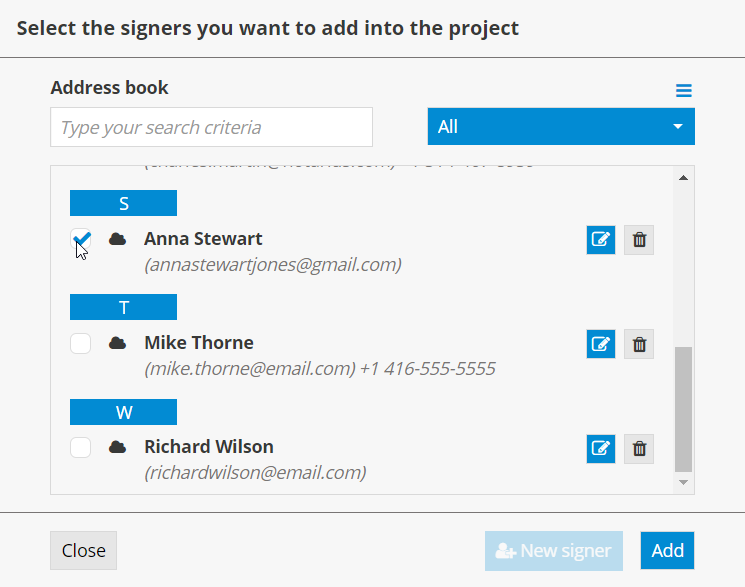
Once the signer has been selected, click on Add.
When you return to the signature project creation page, the selected signers will be displayed in the project participants zone.
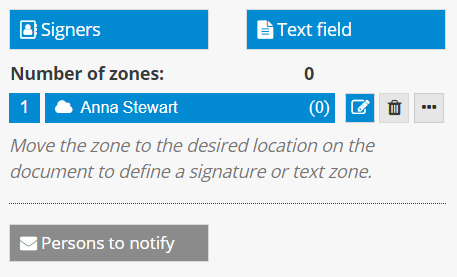
You must now determine where the signature zones for each signer will be displayed in your document.
To do so, first display the page where you would like to insert a signature zone by scrolling the document using your mouse or entering the page number.
Then drag and drop the signature zone to the desired location (you must click on the signature zone, move it while holding the mouse button down and release the button when the signature zone is in the desired location on the document).
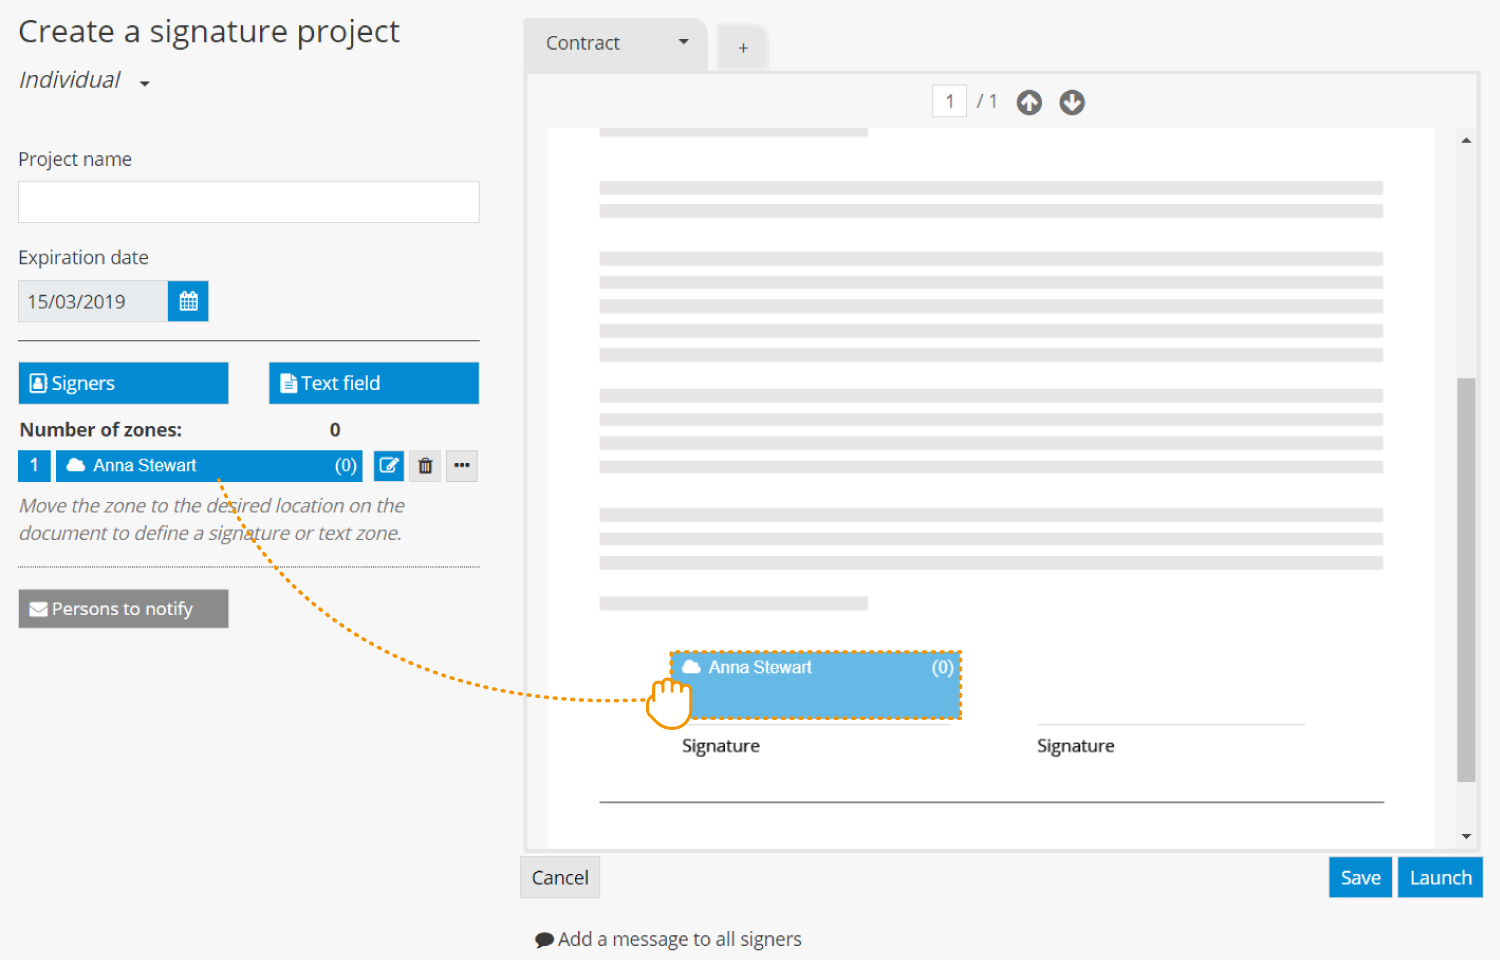
A preview of the signature zone will be displayed to indicate where the zone has been applied.
Note: A blue signature zone indicates that it is a zone to be signed.
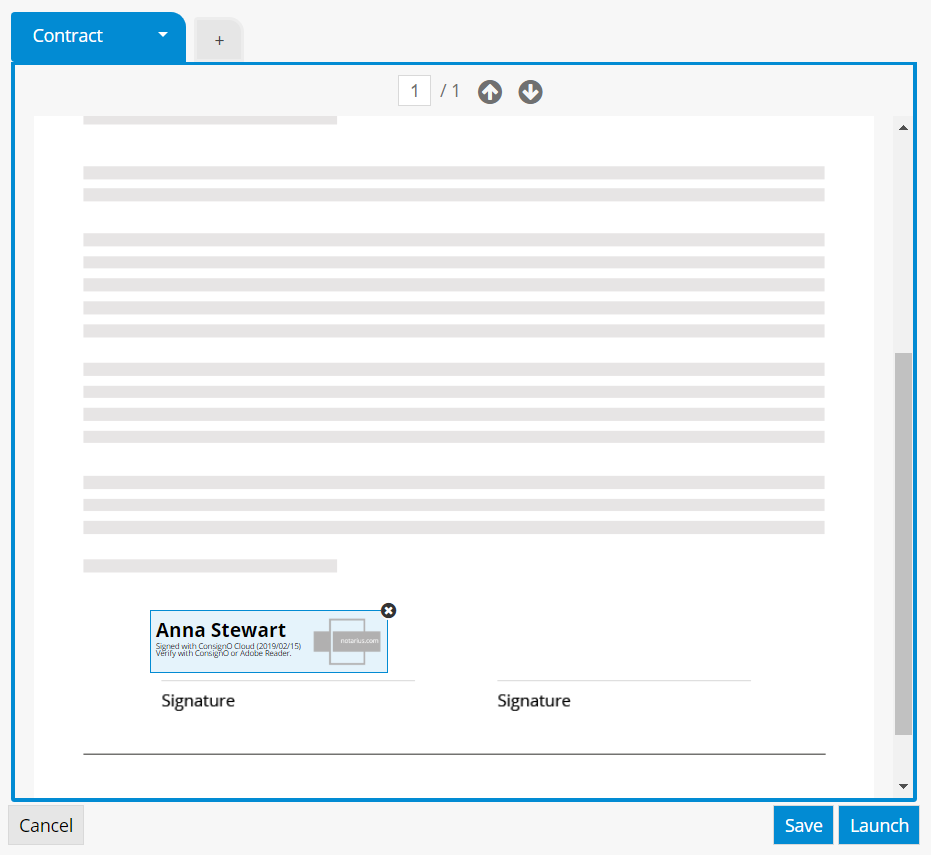
To move the signature zone, drag and drop it to the desired location (to do so, click on the signature zone, move it while holding the mouse button down and release the button when the signature zone is in the desired location on the document).
To remove the signature zone, simply click on “x.”
4- Launch the signature project
Once the project is ready to be sent, click on Launch.
The Terms of Use will be displayed. Click on “I have read, understood and agreed to these conditions” to launch the signature project. The signer(s) will then receive a notification inviting them to electronically sign the project that you have prepared.
![]() You will receive a notification each time a signer has signed the document and upon project completion.
You will receive a notification each time a signer has signed the document and upon project completion.
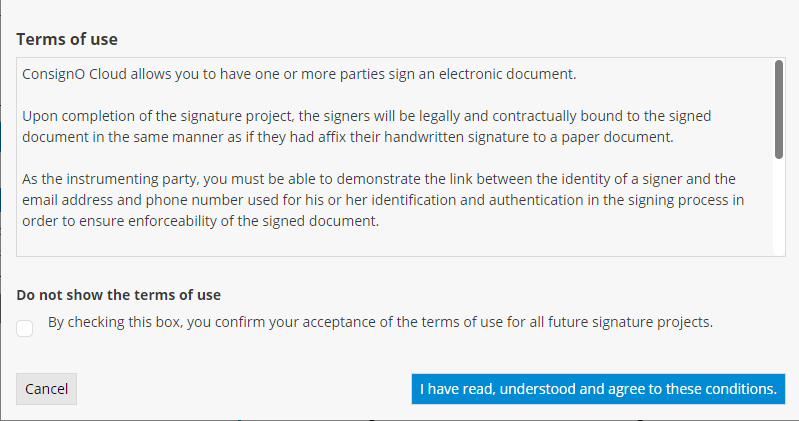
You can choose not to display the Terms of Use for future signature projects by checking the box designated for this purpose.
If you are not ready to launch your signature project, you can save it as a draft by clicking on Save. The signature project can then be accessed from the dashboard with the status of “Draft.”
*Default values may be different if your organization has set its own default values.
